2.1.5 Short Message Management
Some type product provide a function which can send a message to appointed person through public to person way, before using the function, it is need to setup short message, customize the short message according to employee. Then upload the short message into the device. The device fully supports two ways to upload the message. One is to directly upload by connected attendance device, anther way is to utilize the U flash disk to upload it, follow us take an example to illustrate how to upload it:
Enter the attendance software System Option under Maintenance/Options menu, put the tick in front of SMS Content Manage in Function Option pagination, then SMS Content Manage take effect and may use it.
Short management “SMS”
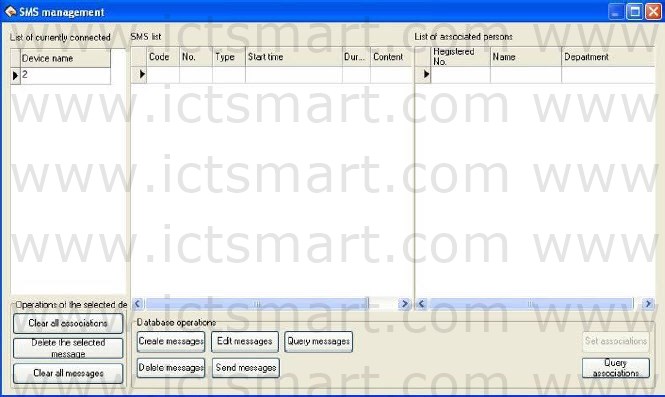
1. Communication setting
On the left side of the window of the current connection machine list, will display the current connection device name.
Note: All of the following about short message operation is directed at the current connection machine.
2. Database Operations
The database operations of short message of basic information maintenance mainly includes the Create message, Edit, Query, Delete message; Send messages, set associations and Query associations.
(1) Create messages
Click “ ![]() “ button on the Database operations bar, the
“ button on the Database operations bar, the
following window will popup:
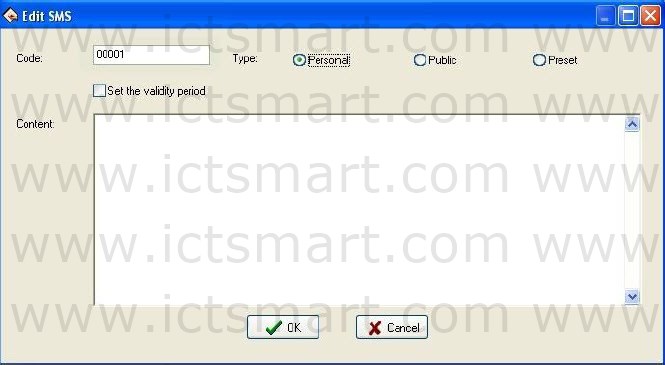
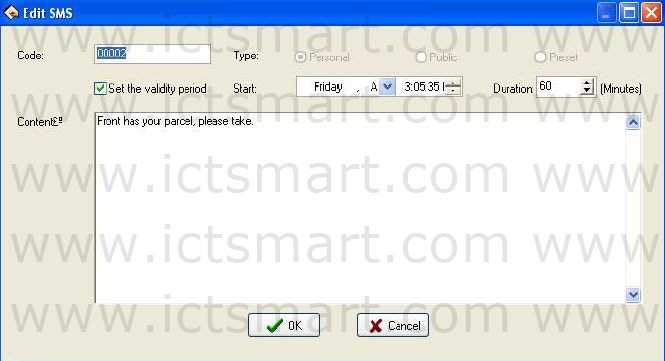
Code: Enter the window is automatically generates a 5 digit code, the user may be required to amend.
Type: Click the “ ![]() “ button to select type. Can choose Personal, Public, Preset.
“ button to select type. Can choose Personal, Public, Preset.
Public: For public short , as soon as the attendance machine start the short message will be saw, it will appear for ever;
Personal: For a personal short message, it will not show until the user verification is positive;
Set the validity period: After choose the item, a line will add on the interface, define the starting time and term of period of validity is available

Start: The user can set the short message display starting time, set up time please refer to Appendix 3.1 Set Date.
Duration: Click “![]() “ button to set duration, the unit is minute; user also can input value in the box.
“ button to set duration, the unit is minute; user also can input value in the box.
Content: Input content of the message.
For example, set as below:

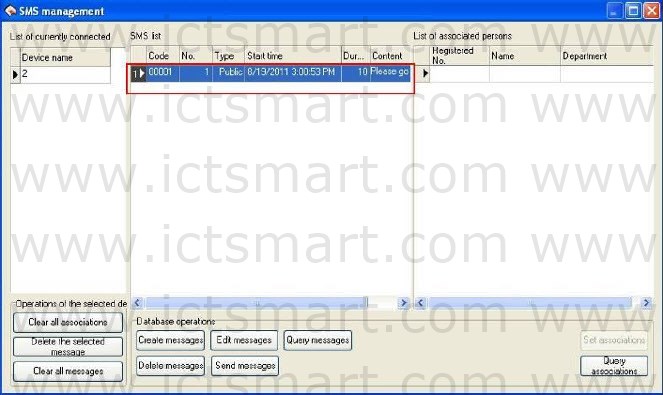
Click “Cancel” button to cancel operation; click “OK” button to save, and then return the SMS management window. The message will be displayed on the window. Show as below:
 (2) Set associations
Note: 1. only the type for personal of the short message can set associative;
2. Set associations’ purpose is distribution of the corresponding view permissions, only selected association employee can see the short message.
A. As shown in Figure, click the SMS which type is personal:

B. Click “Set associations” button, the following window wills popup:
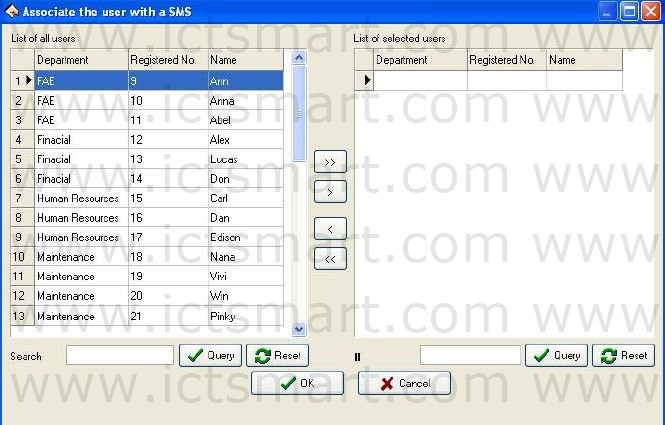
Select employee in the list of all users, use the button on the middle of window to move employee. The operator can input search content in the box after search item. Click “Query” button to see the result in he user list on the left side.
The window button operation is described as follows:
![]() Select all users, and then move them to List of selected user.
Select all users, and then move them to List of selected user.
![]() Move the currently selected users to List of selected users on the right side of window.
Move the currently selected users to List of selected users on the right side of window.
![]() Select users on the List of selected users; click this button to move them to the List of all users on the left side of window. Cancel associations.
Select users on the List of selected users; click this button to move them to the List of all users on the left side of window. Cancel associations.
![]() Move all users of List of selected users to List of all users on the left side of window.
Move all users of List of selected users to List of all users on the left side of window.
C. Click “OK” button to save; click “Cancel” button to cancel operation.
For example select users as below:

D. Click “OK” button to return SMS management window, show as below:
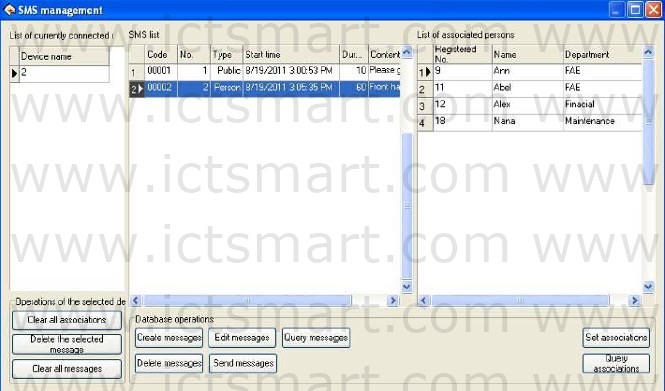 As shown in Figure. The window on the right association list shows the employee has been selected in steps C.
(3) Query associations
A. Click “Query associations” button, the following window wills popup:
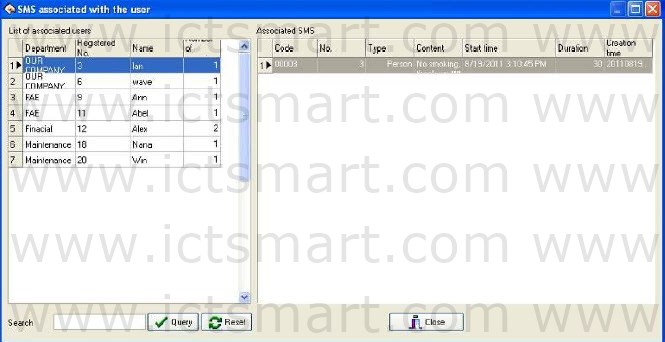
As shown in the figure, the window is divided into two lists, the left list is List of associated users, and this list shows the associated user branch department, registered number, name and number of associations.
Number of associations is associated with the total number of short message the user associated. The right list is Associated SMS; display the selected user association of short message.
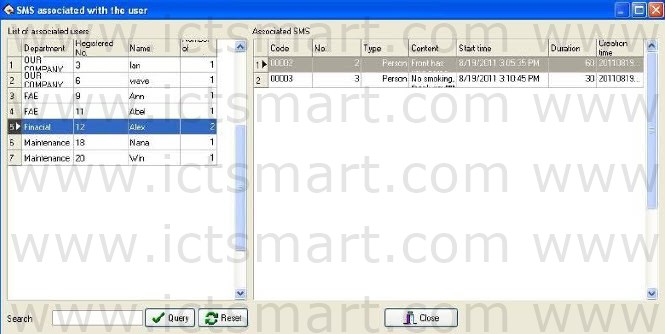
B. Click to the user in List of associated users, and then the list on the right will automatically display the user associated short message. If the selected users to “Alex”, this time on the right of the window list will show its associated short message, as shown below:
C. When there is too much for associated users, users can input user information into the search box, click “Query” button to see result. For example input “Win” into the search box, and click “Query” button, show the result as below:
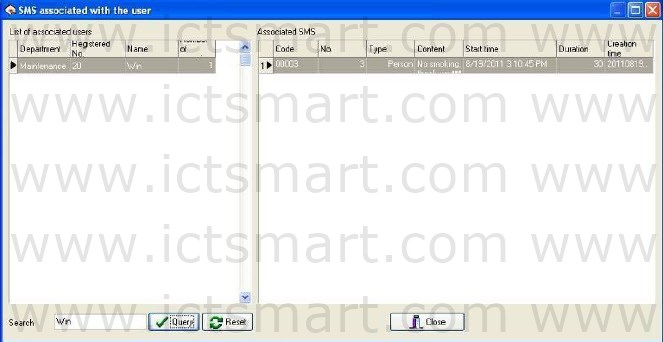
At the left of the window list will only show the user Win’s information. On the right of the window will show the user associated with the short message. Click “Reset” button, empty query results, and returning to the step A is shown in the window.
(4) Edit messages
Click the short message on the list to select it, click “Edit messages” button, the following window wills popup:
User can modify for need, Type can’t be changed. The operation is same with create messages.
(5) Query messages
A. Click “Query messages” button, the window will automatically popup Query bar, show as below:
 B. User can Fuzzy query of codes and contents exact query of numbers. Click “Query” button to query; click “Reset” button to clear query result, and then return the default window. For example input 2 into the box, click “Query” button, the result show as below:
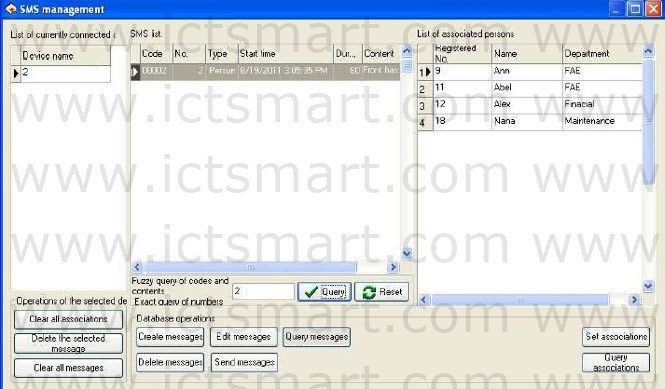 As shown in the figure, short message list shows the number 2 short message; List of associated persons shows the short message associated personnel information.
(6) Delete messages
A. Select the message you want to delete, click “Delete messages” button, the following window wills popup: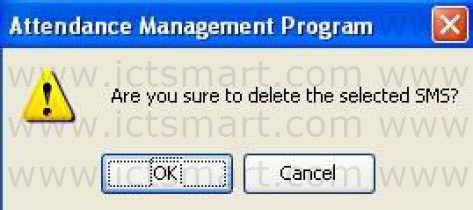 B. Click “OK” button, the following frame wills popup:
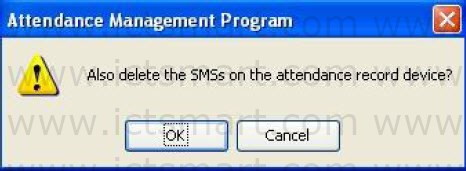 Click “OK” button to delete the message in the software and attendance machine; click “Cancel” button only delete the message in the software.
C. Click “OK” button, after complete delete, popup the success frame, show as below:
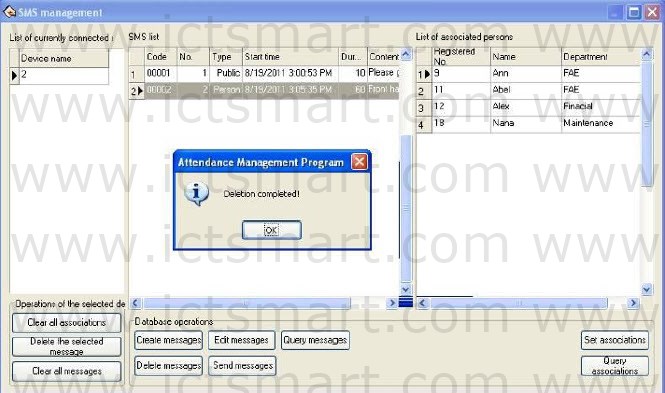 As shown in Figure, the short message list does not display this message, means Delete successfully.
(7) Send messages
A. Select the message need to send, click “Send messages” button, will show the send process on the window, and show as below:

B. After send success, popup the following frame:
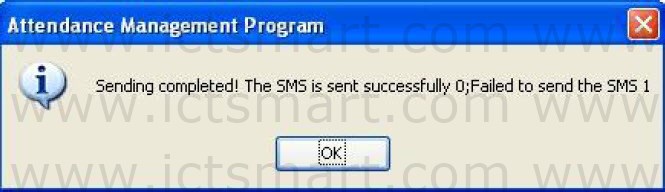 Click “OK” button to close this prompt box.
Notice: The machine must support the short message function, or can’t use the function.
3. Operations of the selected device
Clear all associations: Click this button, clear all associations the device has set. Delete the selected message: Click this button, delete the selected message. Clear all messages: Click this button, clear all messages in the device.
| ย้อนกลับ | กลับสู่เมนูหลัก | ถัดไป |